I’m finally going to put into words the record of my 2019 journey on the John Muir Trail (JMT). Those 21 days were one of the most intense experiences of my life, and after coming off the trail I spent a while in what people call post-trail depression—that strange “hiker’s high” in reverse.
They say it’s something PCT thru-hikers often go through, but if even I felt that low after “just” hiking the JMT, then it’s not hard to imagine why they can feel hollowed out when their long journey ends.
In 2019, I quit my job in the spring, and that fall—between late September and October—I hiked the JMT end to end. More than five years have passed since then, but I still haven’t done a traverse on a scale that surpasses that trip.
Back then, I had done backpacking trips of up to about six days. But a 21-day trek was completely uncharted territory for me. That’s exactly why I devoured accounts from people who had completed the JMT before me, and built my own plan piece by piece.
1.Why I Decided to Hike the JMT.
Why a Long Trail?
I first got into backpacking in 2003. The spark goes back about two years earlier, when a friend took me on an easy hot-springs hike near Los Angeles. During that trip, he excitedly told me about his own experience section-hiking the JMT. That story stayed tucked away in a corner of my mind for years.
Not long after, I was transferred to Tennessee and ended up living there for a while. I was still a complete beginner then—barely any experience at all. And yet, one day out of nowhere, I felt this strange, unexplainable urge: I want to take backpacking seriously. Even now, it feels a little mysterious.
Luckily, I was surrounded by the kind of wild, Appalachian landscape that invites you outside, with places like Great Smoky Mountains National Park just a short drive away. So I decided to go for it—my true “backpacking debut.” I was a little past thirty at the time. This was back when YouTube was either nonexistent or not something I knew about, so I taught myself the old-fashioned way: by obsessively reading REI’s “Backpacking Basics” pages and figuring it out through trial and error. But once I actually started walking, I was hooked almost immediately, and I began taking regular time off just to get back into the mountains—even if, at first, my trips were small ones: two nights, three days at most.
I also started subscribing to Backpacker magazine, and the long traverses they featured in the Sierra Nevada and the Rockies filled me with a powerful longing. The deeper I fell into the world of backpacking, the harder it became to ignore the existence of long trails—routes like the John Muir Trail (JMT) and the Pacific Crest Trail (PCT).
There’s a certain philosophical pull to a long-distance journey—something beyond scenery and mileage. That pull slowly, steadily grew inside me.
Still, trails like the PCT or the AT (Appalachian Trail), which can take close to half a year, felt impossible for someone working a regular job. No matter how I looked at it, I couldn’t imagine getting that much time off.
So I thought: If not that… then at least the JMT—something you can do in around three weeks.
And little by little, the JMT began to shift—from a distant dream into something that felt just within reach.
Why the JMT?
Around 2009, I moved back to Los Angeles—and suddenly the Sierra Nevada, which I’d admired from afar for so long, became something close. From that point on, the desire to hike the JMT only grew stronger. But honestly, at the time it felt completely out of reach. Hiking the JMT would require a long stretch of time off, and I kept telling myself, Unless I quit my job, this probably isn’t going to happen. So I hesitated, unable to make the decision, and years slipped by.
Even so, while I was still living in the U.S., one vague feeling never went away: I have to do this someday. The more JMT videos I watched on YouTube, the more that longing expanded. Up to that point, my longest backpacking trip had been about six days. And yet, for some reason, I started believing—almost obsessively—that
Finishing the JMT would be a rite of passage for me.
I went backpacking almost every year, but work was demanding, and even at best I could only get out there maybe twice a year. Somewhere inside, I felt like a “backpacker in name only”—like I couldn’t shake this lingering sense of being a beginner.
That’s why I clung to the idea that if I could complete the JMT, I’d shed that feeling—peel back one layer after another—and finally become a real backpacker.
Looking back, it was close to a personal myth… but at the time, that expectation was very real inside me.
My State of Mind Before the Hike
For some reason, in 2019 I started feeling this strong intuition: If I’m going to hike the JMT, it has to be this year. So as soon as March arrived, I went after a permit.
Strangely enough, not long after I made that decision, an “accidental” opening appeared—something that led to me quitting my job in May. It felt as if I was being guided from somewhere. I’d been living a work-centered life for so many years, and I’d begun to question it. The desire to reset myself—completely—was already there.
Physically, I actually felt more confident than I had in my thirties. And emotionally, I had this near-certainty: If I’m going, it has to be now.
Before I knew it, I was 46.
I wasn’t at an age where I could keep pushing it off with “someday.”
Inside me, a quiet determination mixed with a sense of urgency.
2. The Permit Process
Starting Trailhead I applyed For
Once March rolled around, I started checking the official permit website to secure a JMT permit. But the early-September dates I’d hoped for were already completely booked.
In the end, the permit I managed to get was for a September 21 start.
If I hadn’t been so set on starting from Happy Isles, I might have been able to get an earlier date.
That winter, from January through March, I took an outdoor course run by the Sierra Club called the Wilderness Travel Course (WTC). One of the instructors I met there had hiked the JMT before, and the stories and advice he shared became a huge part of how I shaped my plan.
According to him, “A lot of people cancel, so if you go for a walk-in permit, you can often get one surprisingly easily.”
I chose to believe that. So I decided to arrive a few days early and take a chance—gambling on getting a walk-in permit on the spot.
If I ever have the chance to hike the JMT again, I think I’d be okay starting from Tuolumne Meadows next time.
Lately, that idea has started to feel more and more appealing.
How I Felt Once My Start Date Was Set
Once I secured the permit, the plan to hike the JMT suddenly snapped into focus as something real. From there, I threw myself into preparation—how to train, what gear to bring, how to plan resupplies—everything.
And honestly, it was a blast.
That time before a journey begins has its own kind of magic: a unique mix of excitement and anticipation. The more I prepared for a world I’d never stepped into before, the more it felt like the JMT was slowly, steadily drawing closer to me.
A Note on Permit Culture
In the American backcountry, the rules vary by area, but in well-managed places like national parks, the culture of the wilderness permit is deeply ingrained. It’s an extremely rational system for protecting mountain environments. By limiting how many people can enter the backcountry—and managing use so that hikers don’t put excessive pressure on the land—the goal is to keep those areas healthy over the long term.
On the John Muir Trail in particular, the trail has only grown more popular year after year, and the number of applicants keeps rising. Without a permit system, the trail would probably be overwhelmed in no time. With too many people, water sources get contaminated, vegetation is trampled, and conflicts with wildlife increase.
The more I think about it, the more I’m struck by how practical wilderness management in the U.S. can be—how well-designed it is as a framework for conservation.
And the moment I finally had a JMT permit in my hands, another feeling quietly surfaced:
I had become one of the chosen few—one of the people allowed into the backcountry for those 21 days.
3.Route Plan (Overview)
Rough Schedule (21 Days)
Getting a permit is the hard part—securing the entry date can feel like the biggest hurdle. But once you have it, the number of days you take to reach Whitney Portal is relatively flexible.
So when I went to the ranger office for a walk-in permit on September 17, I made the final call: I would hike the trail on a 21-day schedule.
My route was the classic, most popular SOBO (southbound) itinerary—starting from Happy Isles in Yosemite and finishing at Whitney Portal.
Resupply strategy
Choosing where to resupply was one of the hardest parts of planning the JMT. In general, though, there are a handful of common options—about five main resupply points most hikers rely on.
Going SOBO from Yosemite, the typical choices are Tuolumne Meadows, Reds Meadow, Vermilion Valley Resort (VVR), Muir Trail Ranch (MTR), or the post office in Independence. The basic idea is the same: you mail a resupply box ahead of time and have it held for you at one of these locations.
After a lot of deliberation, I decided to resupply at Reds Meadow and Muir Trail Ranch (MTR). The real question was what to do after MTR—whether I should exit the trail and go all the way out to Independence for an additional resupply.
From the JMT junction, just getting over Kearsarge Pass and out to the Onion Valley trailhead is already more than seven miles. From there, the town of Independence is another 15 miles or so away. If you couldn’t catch a hitch at the trailhead, you might end up spending close to three days just for resupply. When I thought about it that way, I simply couldn’t commit to it.
In the end, I chose to resupply only twice—Reds Meadow and MTR. That meant carrying about ten days of food all at once from MTR to Mount Whitney. To be honest, it was heavy.
And because of that, unless you go out to Independence, the biggest challenge on the JMT is still that long, no-resupply stretch from MTR to Whitney.
The Inevitable Math of Fitness and Mental Strength
A typical JMT thru-hike—of course it varies by person—is often said to take roughly 17 to 21 days. I decided to build in a buffer and go a little slower, so I planned for 21 days, which worked out to around 10 miles per day on average.
Along the way, I took a full rest day—a true zero day—at Vermilion Valley Resort (VVR), and even with that, I still managed to finish the trail within 21 days. VVR was an amazing place. The staff were incredibly friendly to hikers, and if you’re hiking SOBO, I genuinely recommend stopping there.
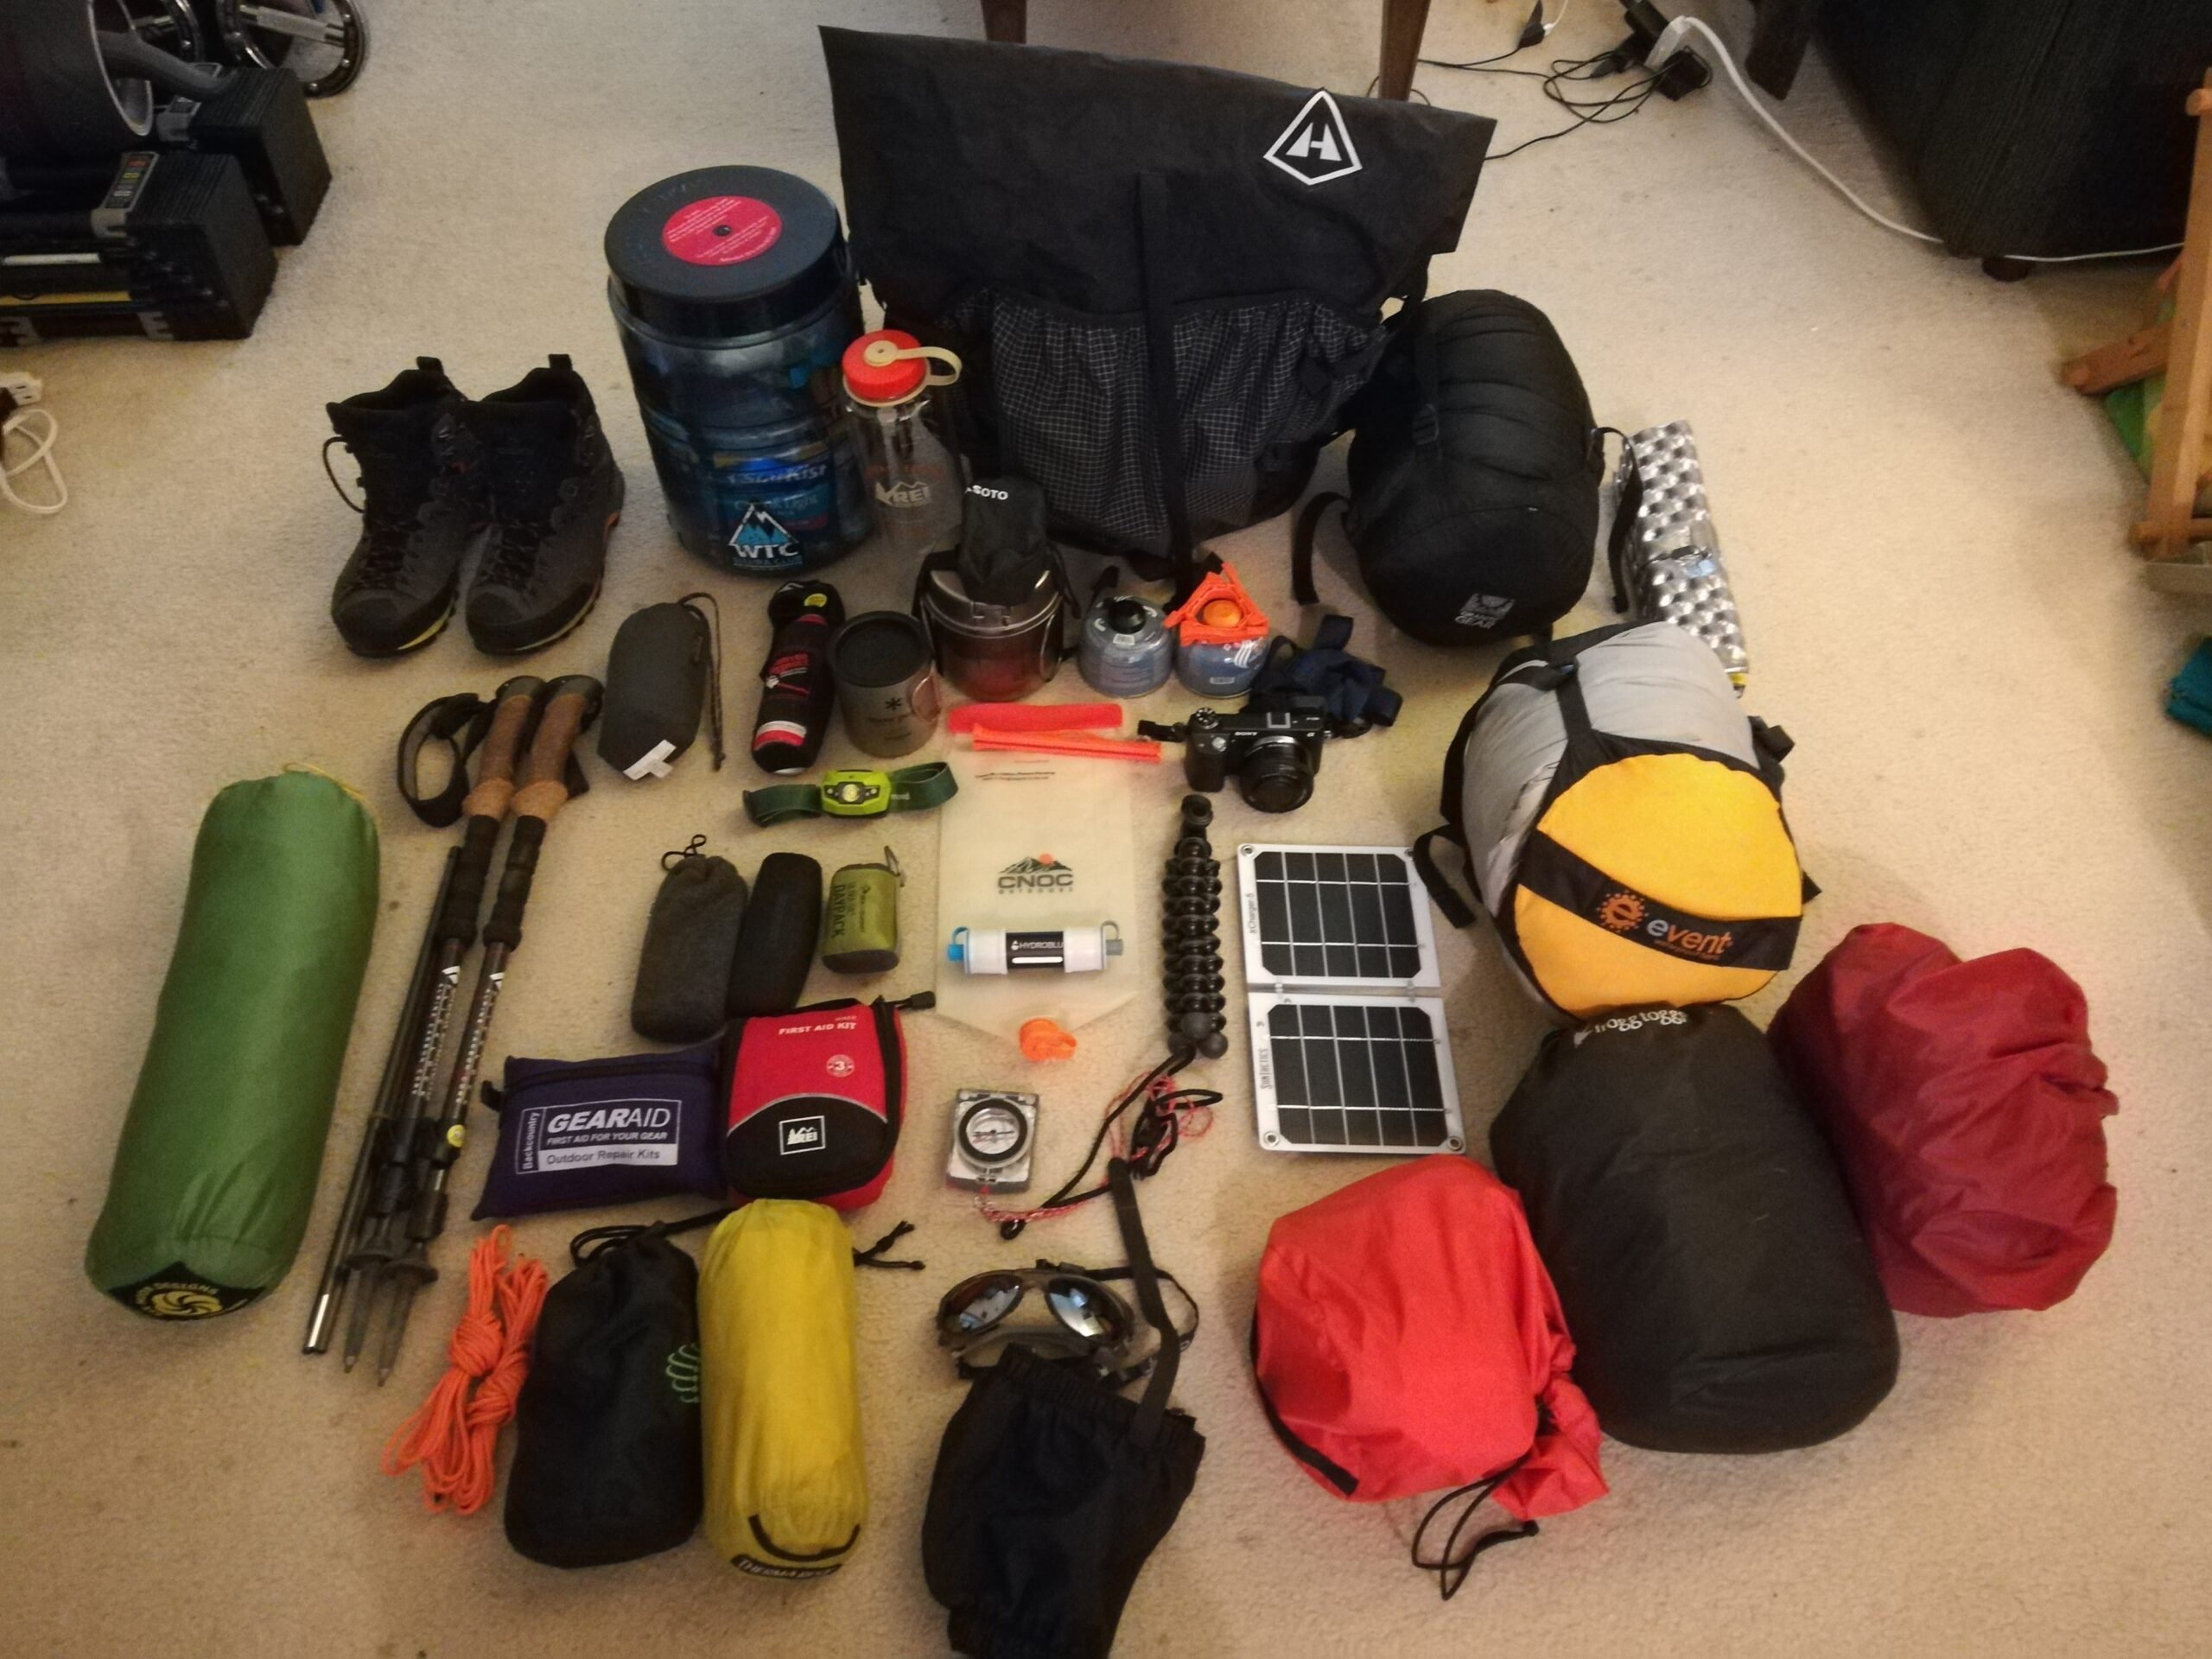
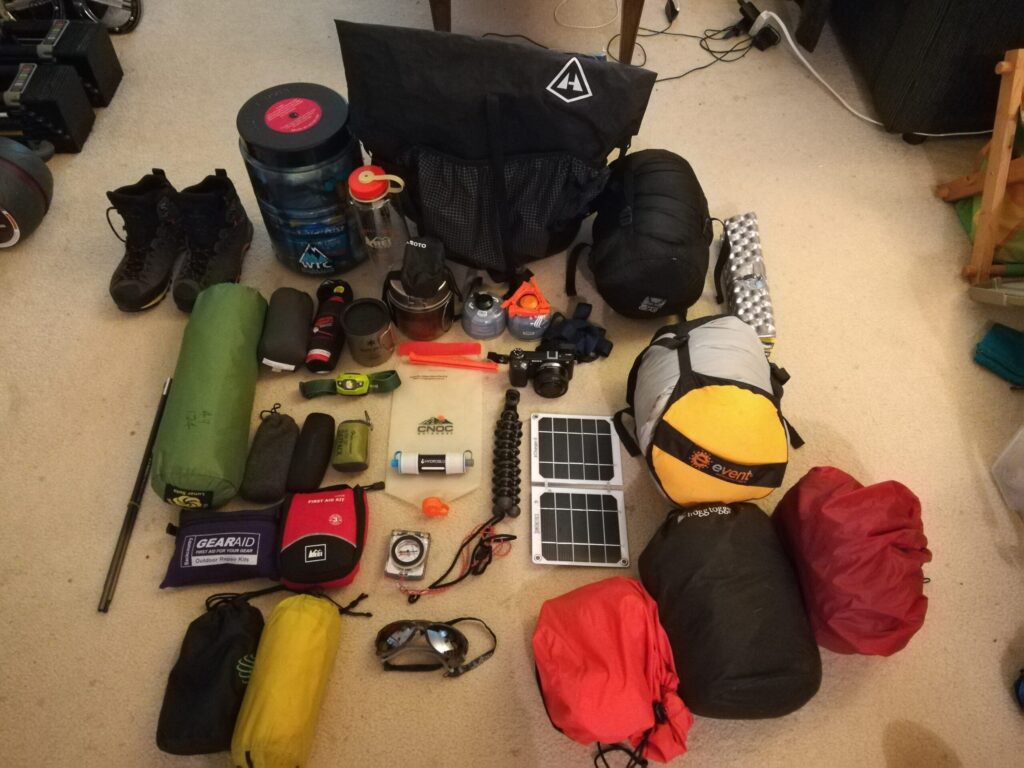
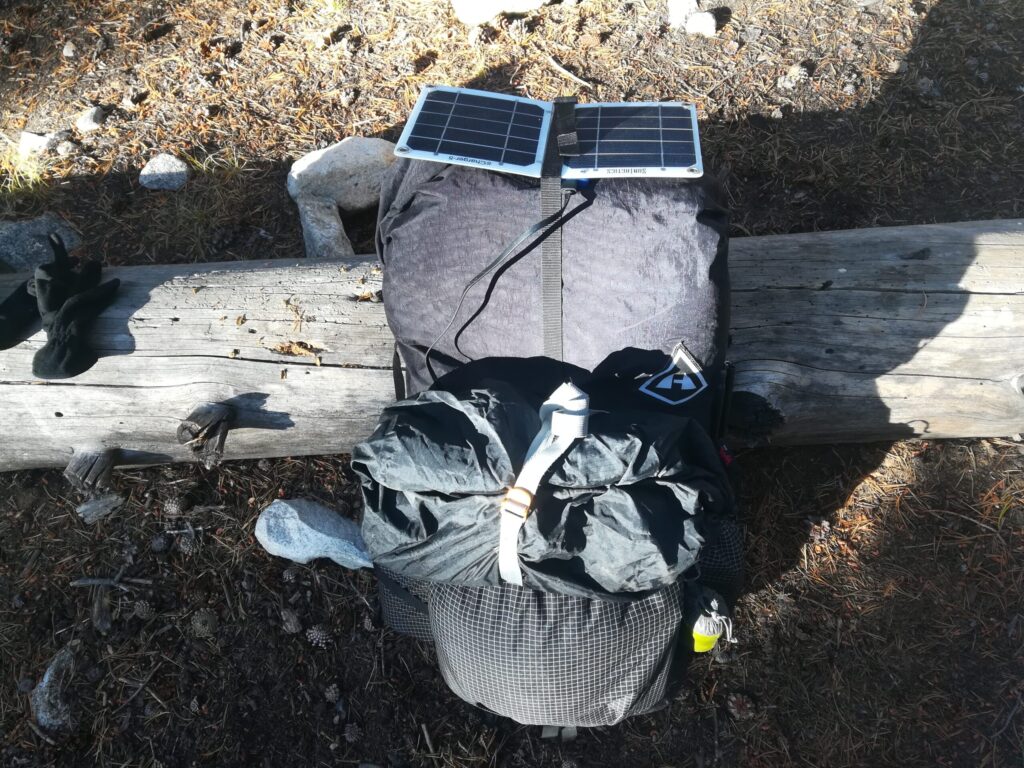
4. Gear Planning
Even though the JMT allows for resupplies along the way, I’d still be carrying roughly seven days of food to reach Reds Meadow, and then—on the final stretch—about ten days of food all the way to Mount Whitney. With that much food weight, I knew I had to lighten my gear as much as possible.
For more than half of my setup, I was able to make do with the gear I already had. But there were also a few items I ended up buying specifically to take on the JMT.
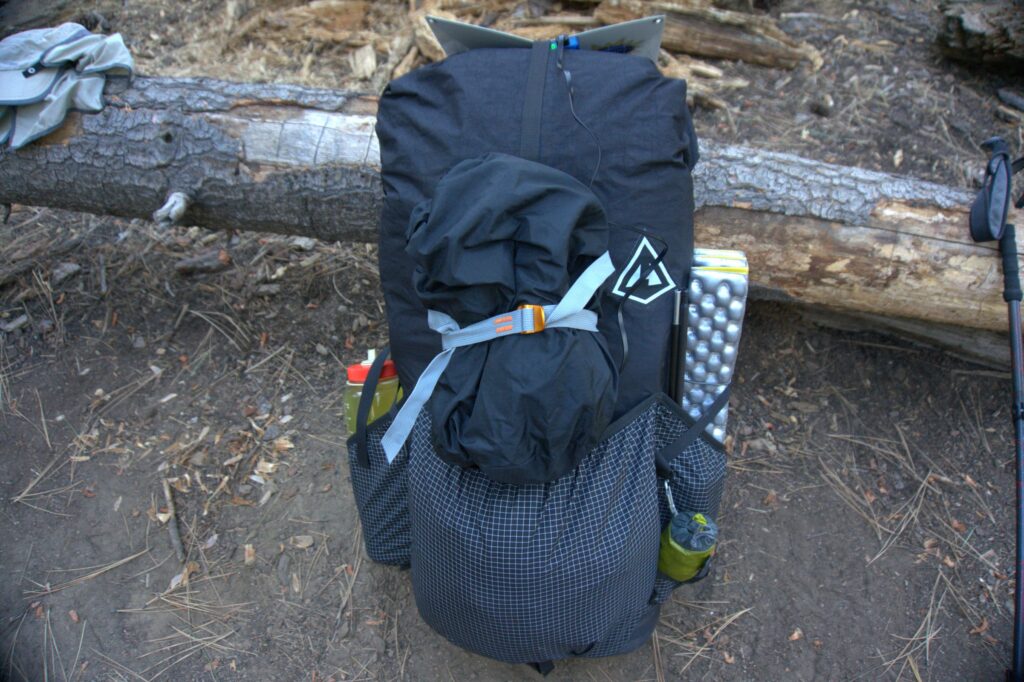
Backpack
Hyperlight Mountain Gear SOUTHWEST 70
Up until then, my go-to pack for any trip longer than three days had been the Mystery Ranch Glacier (70L). It was an incredibly tough, dependable pack—but the pack itself weighed around 3 kg. If I was serious about cutting weight, I figured this was the first place to rethink.
After researching lighter but still durable packs in the 70-liter range, I landed on the Hyperlite Mountain Gear (HMG) Southwest 70. Back in 2019, HMG was already well known among PCT and AT thru-hikers, and it felt like the brand was just starting to become popular among more “regular” backpackers too. I’d also been curious about Dyneema packs, so I decided to go for it.
I did a test hike before the JMT, and it immediately felt like a genuine game changer. The weight was only 2.5 lb (about 1.15 kg)—when I first picked it up, I was honestly shocked by how light it was. At the same time, the stated max load was 60 lb (about 27 kg). My first reaction was skepticism: Can something this light really handle weight? Until then, I’d been steeped in the old-school philosophy that “heavy-duty, heavy packs”—like Mystery Ranch (the former Dana Design) or Gregory—were the only packs that could truly carry loads well. In a way, this was the period when I was slowly shedding that mindset and beginning to shift toward an ultralight approach.
My total starting weight out of Mammoth was about 35 lb (around 16 kg), and the Southwest 70 handled it with ease. If anything, it carried better than my Mystery Ranch Glacier. One reason HMG isn’t “just a lightweight pack” is that it isn’t frameless—it has internal aluminum stays—and it also comes with a thick, well-padded hip belt. That combination meant I could carry it properly on my hips, the way you would with a conventional load-hauler. It wasn’t only light—it didn’t compromise on actually carrying weight. For me, it hit a rare sweet spot.
The Dyneema material also felt extremely tough, had a premium texture, and the fact that it’s almost waterproof added another layer of reassurance.
Even though it’s a 70L pack, I could fit my bear canister (BearVault BV500) inside the main compartment, laid sideways. Many of the PCT hikers I met on the JMT were using slightly smaller 50–60L packs and carrying their bear canisters strapped on the outside, though I did meet a few hikers using the Southwest 55.
It was pricey—$380 at the time—but when I considered that a brand-new Gregory or Osprey wasn’t dramatically cheaper at full retail, the price-to-quality balance didn’t feel unreasonable. HMG moved production to Mexico starting in 2020, and this pack ended up being one of the last models made in Maryland. As of 2025, it’s still going strong and I’m still using it without any issues.
Shelter
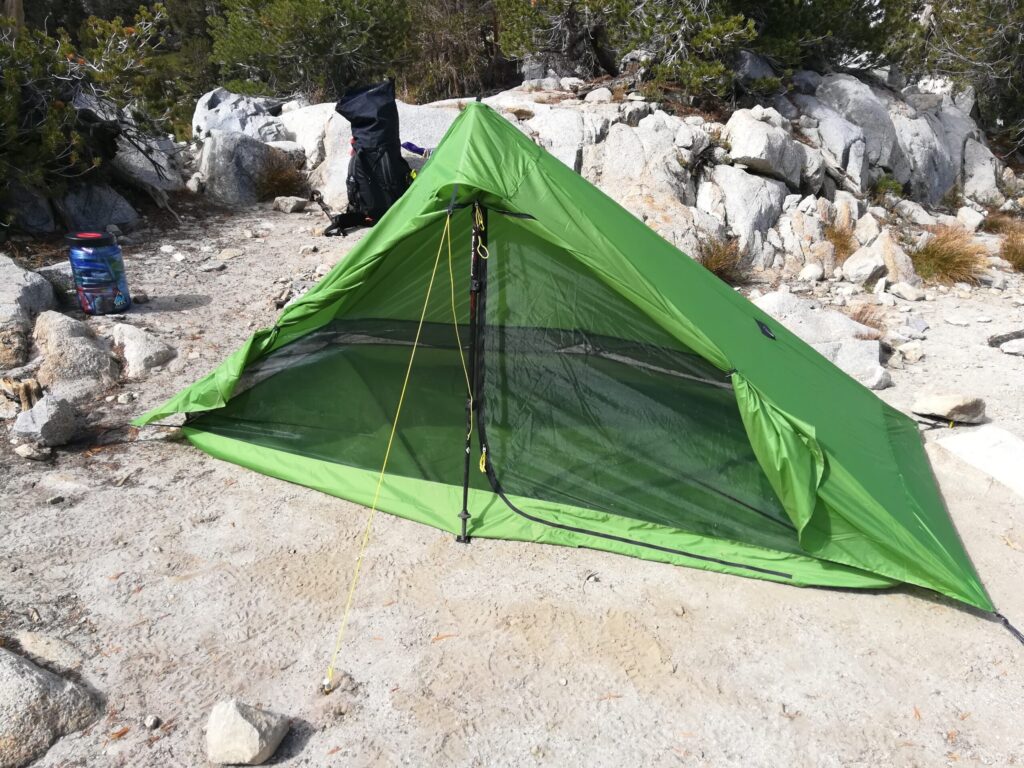
Six Moon Designs Lunar Solo
Since around 2014, I’d been using a trekking-pole tent called the Tarptent Stratospire 1. At roughly 1,000 grams, it was already plenty light. But during my JMT prep, it happened to be damaged and I’d sent it out for repair. I also owned an Arai Tent Air Raiz 2, but that one was even heavier—and I just couldn’t picture bringing it on the JMT.
So I decided to buy a new tent specifically for this hike. I figured a trekking-pole shelter would make the most sense for cutting weight. I researched a bunch of Dyneema UL tents as well, but they were all so expensive that I couldn’t bring myself to pull the trigger.
That’s when I noticed the Six Moon Designs Lunar Solo—a model that had just been released in 2019 and had won Backpacker Magazine’s Editors’ Choice award.
At launch, it cost $260. Compared to Dyneema shelters, that felt far more approachable—cheap enough that I could justify trying it. Even though it uses polyester fabric, the weight was only about 720 grams. Among non-Dyneema tents at the time, it was pretty much in the very top tier for low weight.
This single-wall, non-freestanding, one-pole shelter struck an excellent balance: lightweight, easy to pitch, and surprisingly livable.
- Excellent ventilation, especially comfortable in summer
- Large mesh panels from the canopy down to the floor; with the vestibule fully open, the view is incredible
- Setup is simple: one trekking pole and six stakes
- The interior feels much roomier than it looks—surprisingly comfortable for a solo shelter
Over the three weeks of the JMT, I lived in this tent every single day, and for a lightweight shelter, the sense of space inside was easily one of my favorite things about it.
Of course, it isn’t a perfect tent. After using it in the real world, I also noticed a few weaknesses.
Needs a larger footprint than you’d expect
Because of the typical non-freestanding layout, you actually need a fairly wide, flat area to pitch it properly. On the JMT it wasn’t a problem—if you stay calm and look around, there’s usually plenty of space to find a good campsite. But at crowded hut campgrounds in Japan, this could be a real challenge.
Weak on ground where stakes don’t hold
On sand or rocky ground where stakes won’t bite, you have to get creative. If the stakes fail and you can’t get proper tension, the tent ends up sagging—and once it goes slack, livability drops fast.
“Cold” because it’s single-wall
The high ventilation is great, but insulation is low. In cooler seasons, you’ll need to compensate with your sleeping bag and layers to stay comfortable.
I hiked the JMT in the shoulder season—late September through October—but it wasn’t an issue because I could compensate with the rest of my gear. These days, I mainly use this tent for summer trips.
Sleeping Bag and Sleeping Pad
Western Mountaineering AlpinLite
Around 2016, I bought my sleeping bag with the JMT in mind—assuming I’d hike it someday. It’s rated to a 20°F comfort temperature, filled with 850+ fill-power goose down, and it’s a truly high-quality bag. Even by today’s standards it’s plenty light, and back then—when I needed something both light and warm enough for the JMT—it turned out to be an excellent choice.
The JMT was already cold in late September, so I’m glad I didn’t go with anything thinner than this.
It was expensive—$700—but it’s still my primary sleeping bag today, and it’s still going strong.
Thermarest NeoAir Xlite
This is a classic, go-to air pad. I bought mine around 2013 and brought it on the JMT as well. It weighs about 1 kg—and when I first bought it, I remember being amazed at how “light” it felt at the time.
Its R-value is 4.5, and on the JMT I slept comfortably with just this pad—no extra insulation needed. For a long trek like the JMT, I did debate bringing a closed-cell foam pad, since puncturing an air pad (or having it fail) can be a real headache out there. In the end, though, I chose comfort and stuck with the air mattress.
Insulation / Rain Gear / Clothing / Boots
Here’s the clothing system I used for the entire JMT:
Patagonia Cloud Ridge jacket
In the heart of the season, the Sierra tends to have more stable weather than many other mountain ranges—long stretches of clear, dry days are common. When I thru-hiked the JMT in late September, it barely rained at all.
Even so, rain gear is essential safety equipment. Preventing hypothermia is one of the top priorities in the backcountry.
Right before my JMT trip, my old Patagonia rain jacket finally broke. I sent it in for repair, and Patagonia offered me store credit—amazingly, the same amount as what I’d originally paid—so I was able to buy a new jacket. The one I chose was the Cloud Ridge Jacket.
If you want to go as minimal as possible, another solid, thru-hiker-standard option (still widely used) is the Outdoor Research Helium II (men’s / women’s).
Western Mountaineering Hooded Flash jacket
Pairing a lightweight rain shell with a warm synthetic puffy is one common way to stay warm at night—but in my case, the insulated jacket I used around camp was a down jacket filled with 850+ fill-power goose down.
It was high quality and very light at 10.25 oz, but also expensive—$460.
Patagonia R1 Air Hoodie
A lightweight fleece is invaluable on cold, wet trips because it can still retain some warmth even when damp. Layered under a synthetic puffy and/or a rain shell, it becomes a very practical piece.
For a summer JMT backpacking trip, you probably don’t need to bring a fleece jacket. But for shoulder-season hiking—when temperatures drop more easily and the weather tends to be less stable—you should absolutely pack one.
On my late-September JMT hike, this fleece became one of my most-used active layers.
Here’s the rest of my clothing list:
Rain pants – REI eVENT rain pants
Hiking pants – REI softshell convertible pants
Hiking shirts x 2 – Patagonia Capilene long-sleeve
Camp shirts – Arcteryx ss crew long-sleeve
Long john bottoms – Patagonia Capilene Thermal
Underwear x 2 – Patagonia Essential boxer
Hiking sox x2- Smart wool
Camp sox - REI
Surf pant
Buff
Sun hat - Outdoor Research Sun Runner Cap
Beanie hat
Gloves / mittens
Scarpa Zodiac Plus GTX – These were mid-size backpacking boots, and they fit my feet so well that I didn’t get a single blister during the entire 21 days on the JMT.
Crocs sandal – Camp shoes. I also used them once for a river crossing.
Food and the Bear Canister
I thought very carefully about how much food to bring. Too much would make my pack heavy, but too little would mean going hungry—and I assumed that would be miserable.
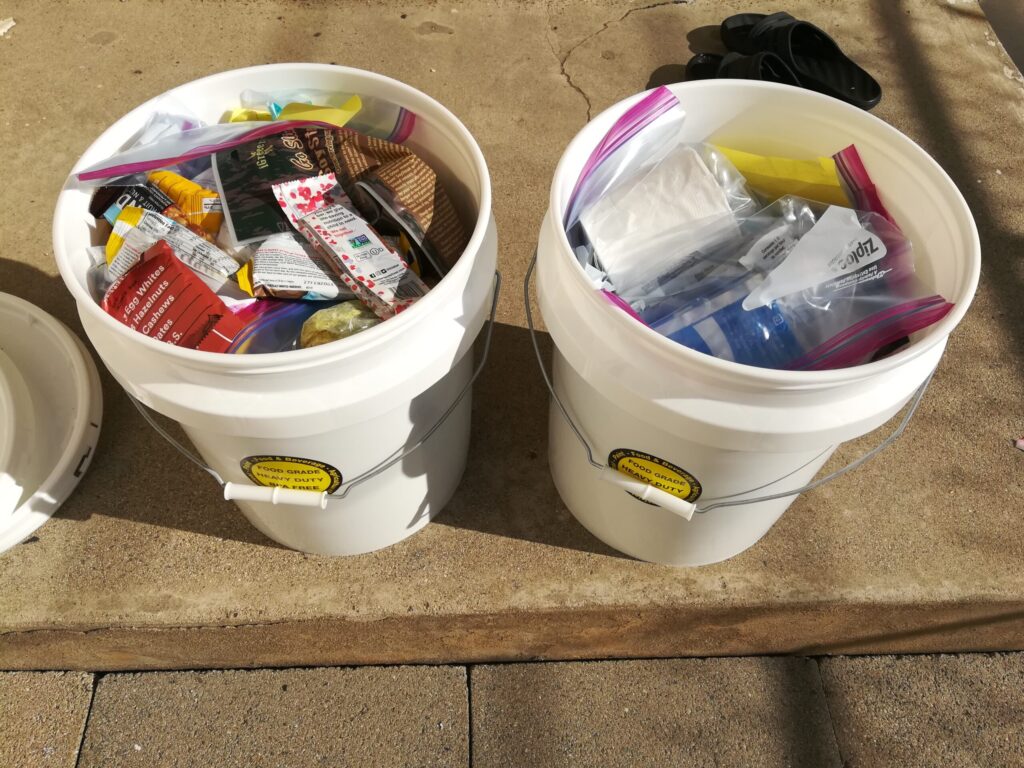
I decided to resupply only twice, so I mailed my food boxes to Reds Meadow and Muir Trail Ranch. Following their instructions, I packed everything in a bucket and shipped it that way. It made sense once I learned why: since the buckets are stored in a backroom or shed, cardboard boxes can get chewed through by small animals.
At first, I planned to rely mainly on the freeze-dried meals you find at places like REI. But that would have gotten expensive fast, so I went with a cheaper approach I’d seen recommended on thru-hiker YouTube channels.
使用した食料品の種類
Freeze-dried meals(Knoss)
Tuna packets(StarKist Tuna Creations )
Beef jerky
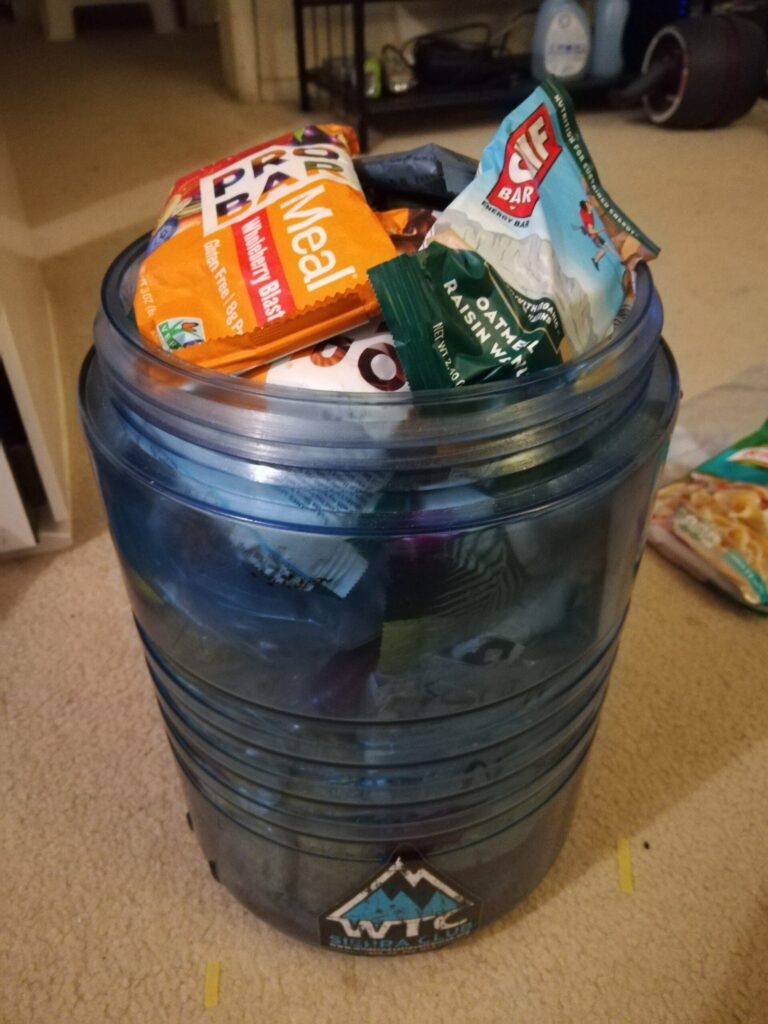
Energy bars(Kind bars / Luna bars/Cliff bars/Pro bars)


Cooking gear
Since my meals were mostly freeze-dried, all I really needed was a reliable way to boil water. I briefly considered bringing a Jetboil, but I decided to go even lighter and more compact with the setup below:
- SOTO WindMaster — lightweight and compact, and true to its name it handles wind well. It also maintains steady performance even in colder conditions.
- Snow Peak Trek 700 pot — a small titanium pot. I used it together with a cup for drinking and meals.
Other gear I brought along:
Summit sack
Trekking poles
Suunto Core watch
Sunglasses
Air pillow
Groundsheet (for yoga)
Trowel
Toilet paper
Bidet bottle
Headlamp (primary)
Headlamp (backup)
Spare batteries
CNOC water bag
Smartphone
Compass
Paper map
Glasses and case
Toothbrush
Wet wipes
Pen
Notebook
Gear first-aid / repair kit
Lighter
Fire starter
Multi-tool
Camera (Sony NEX-7)
Spare batteries ×2
GorillaPod tripod
Waterproof bag for camera
Front pouch for camera
Power bank 10,000 mAh ×1
First-aid kit
Sunscreen ×1
Hard water bottle ×1
Soft water bottle ×1
HydroBlu water purifier filter
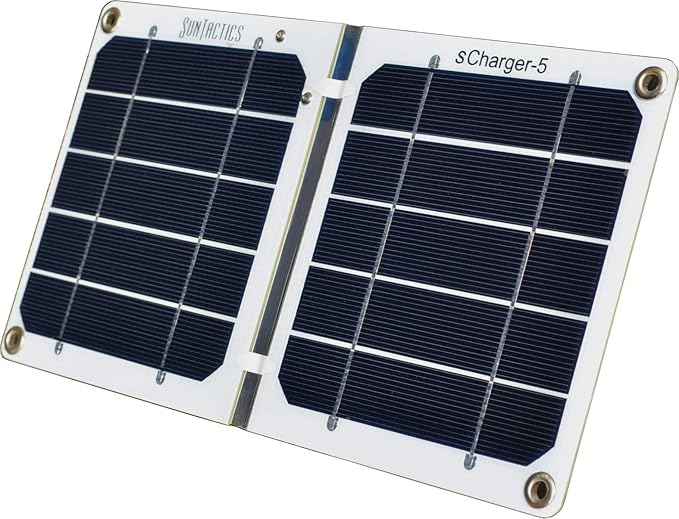
Solar charger
For navigation, I used a GPS app called Guthook’s John Muir Trail Guide.
It seems that app is no longer in use today.
コメント